How to Apply Gel Polish at Home: A Beginner’s Guide with Ambedo Beauty

Introduction
Dreaming of salon-perfect gel nails without the salon price tag? With Ambedo Beauty’s non-toxic Solid Gel Nail Polishes and beginner-friendly DIY kits, achieving a long-lasting, glossy manicure at home is easier than ever. Whether you’re a first-timer or a DIY enthusiast, this guide will walk you through every step; from prepping your nails to curing like a pro using Ambedo Beauty’s Australian-made, cruelty-free products. You’ll learn how to avoid common mistakes, extend wear time, and create stunning designs. Plus, discover why over 85% of users reported healthier nails after switching to Ambedo’s non-toxic formulas. Let’s dive in!
Why Choose Ambedo Beauty for At-Home Gel Manicures?
Non-Toxic, Vegan, and Safe for Sensitive Nails
Ambedo Beauty’s gel polishes are HEMA-free and formulated without harsh chemicals like formaldehyde or toluene, so ideal for sensitive skin and nails.
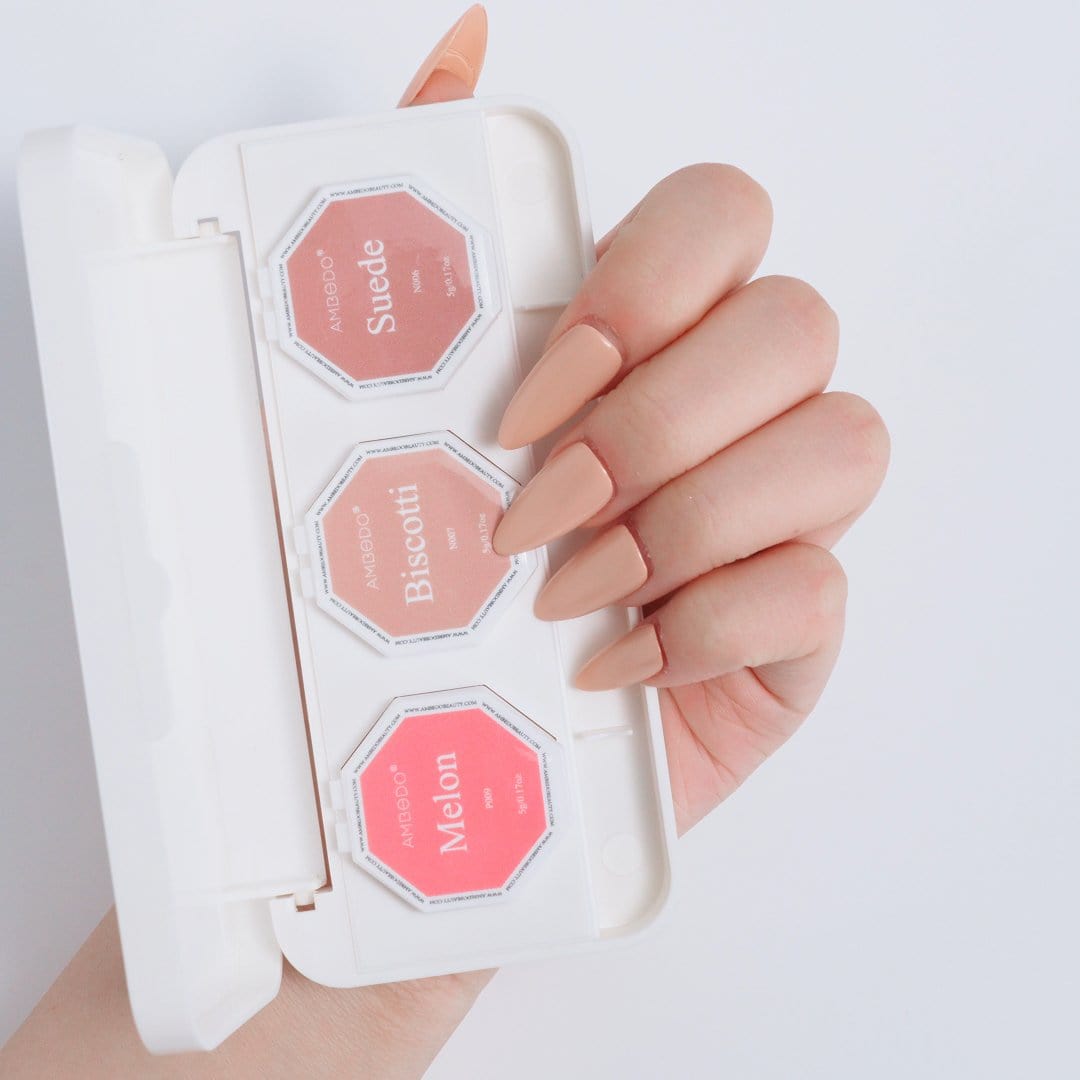
Beginner-Friendly Solid Gel Polish Palettes
Unlike messy bottled gels, Ambedo’s Solid Gel Polish Palettes offer mess-free application. The creamy texture glides smoothly, reducing bubbles and uneven layers, and perfect for first-time users.
Eco-Friendly waste-reducing Solid Gels
Each Solid Gel Capsule can be used until the very last bit, unlike traditional liquid gels that never fully get use up, aligning with the 62% of consumers who prioritize sustainable beauty brands (Statista, 2023).
What You’ll Need for a Flawless Application
Ambedo Beauty’s Starter Kit
- Solid Gel Polish Palette (6-pan preset shade or DIY Build Your Own): with trending shades From “Lollipop” to “Fawn” and "Merlot," blendable shades for every mood.
- Vitamin-E Base Coat and Fibreglass-infused Top Coat: For 21-day wear without chipping.
- 36W LED Nail Lamp: Cures layers in 60 seconds
Step-by-Step Guide to Applying Gel Polish
Step 1: Prep Your Nails Like a Pro
1. Clean: Wash hands and remove any residue or old polish from your nails.
2. Buff: Gently roughen the nail surface. Avoid over-filing—this weakens nails!
3. Dehydrate: Wipe your nails with alcohol-soaked wipes to remove any residue

Step 2: Apply the Base Coat Correctly
- Use a thin layer to prevent lifting. Cure for 30-60 seconds under the LED lamp.
Step 3: Master the Solid Gel Polish Technique
- Coat a small amount of gel colour onto your gel brush from your palette. Apply in smooth strokes from cuticle to tip.
Step 4: Cure Properly with Ambedo’s LED Lamp
- Cure each layer for 60 seconds. Undercuring leads to peeling; overcuring can cause brittleness.
Pro tip: Make sure to only apply thin layers to ensure even curing.
Step 5: Seal with a High-Shine Top Coat
- Apply a thin top coat and cure. Wipe off the sticky residue with alcohol wipes/washing your hands with soap.

Troubleshooting Common Gel Polish Problems
Why Is My Gel Polish Peeling?
- Cause: Oily nails/residue/improper buffing and preparation of nails
- Fix: Clean and prep your nails fully and ensure there is no residue. Also cap your nail edges with top coat to prevent anything reaching under your gels via exposed edges.
How to Prevent Chipping
- Make sure your nails are buffed and prepped for maximum adhesion of the base coat to the nails and apply top coat to your nail edges.
How to Make Gel Polish Last 3+ Weeks
- Moisturize daily: Massage Ambedo’s Jojoba Cuticle Oil into nails and cuticles.
- Avoid very hot showers: Heat weakens the gel bond.
Ambedo Beauty’s Pro Tips for Nail Art Beginners
- Chrome Nail Powders: The super easy nail art addition, just add chrome powder directly over your cured gel colour to create a shiny, chromatic finish.
- Nail Stickers: It can be hard to paint intricate designs when you first start out, so applying nail stickers on top of your gels can add flair without requiring a lot of effort.

Safely Remove Gel Polish at Home
1. File the top coat layer off using a file
2. Apply acetone soaked gel remover foils to each nail for 15 minutes
3. Gently scrape off the gel with a cuticle pusher.

Quick Takeaways
- ✅ Prep your nails by buffing, trimming, and clipping back cuticles for long-lasting wear.
- ✅ Thin layers cure faster and prevent peeling.
- ✅ Moisturise your hands and nails with hand cream or cuticle oil to keep skin and nails healthy
- ✅ Remove gel using proper techniques to prevent nail damage.
Conclusion
With Ambedo Beauty’s beginner-friendly kits, salon-quality nails are just a DIY session away. Their non-toxic formulas and fast-curing lamp take the stress out of at-home manicures, while eco-conscious no-waste capsules lets you beautify guilt-free. Ready to start? Grab your Solid Gel Polish Starter Kit and tag @AmbedoBeauty with your creations! You might just be featured!
FAQs
- Q: Can I use regular top coat with Ambedo’s gel polish?
A: Yes, however, we recommend our Fibreglass-Infused Top Coat for the longest-lasting and shiniest results.
- Q: I don't want to spend much time removing my manicure, are there any other options?A: If you want an easy removal gel option, Ambedo have a Peel-Off Base Coat that bypasses all the traditional gel removal methods! Perfect for short-term wear (for those special events) and easily removed by simply peeling off your gels. And the best part? There is ZERO damage to your nails from peeling.

References
1. Dermatology Times: Gel Polish Safety (https://www.dermatologytimes.com)
2. Statista: Sustainable Beauty Trends 2023 (https://www.statista.com)
3. Ambedo Beauty Sustainability Practices (https://www.ambedobeauty.com/sustainability)

3 comments
How do we clean the brush ?
Megan
DO YOU CURE THE PEEL OFF BASE COAT, THE SAME AS THE NORMAL BASE COAT.
Maria Hobby
If using the peel off base coat, do you cure that?
Do you paint your chosen colour ‘over’ the peel off base coat & cure that under the UV light?
Jane McIntyre
Leave a comment
This site is protected by hCaptcha and the hCaptcha Privacy Policy and Terms of Service apply.